
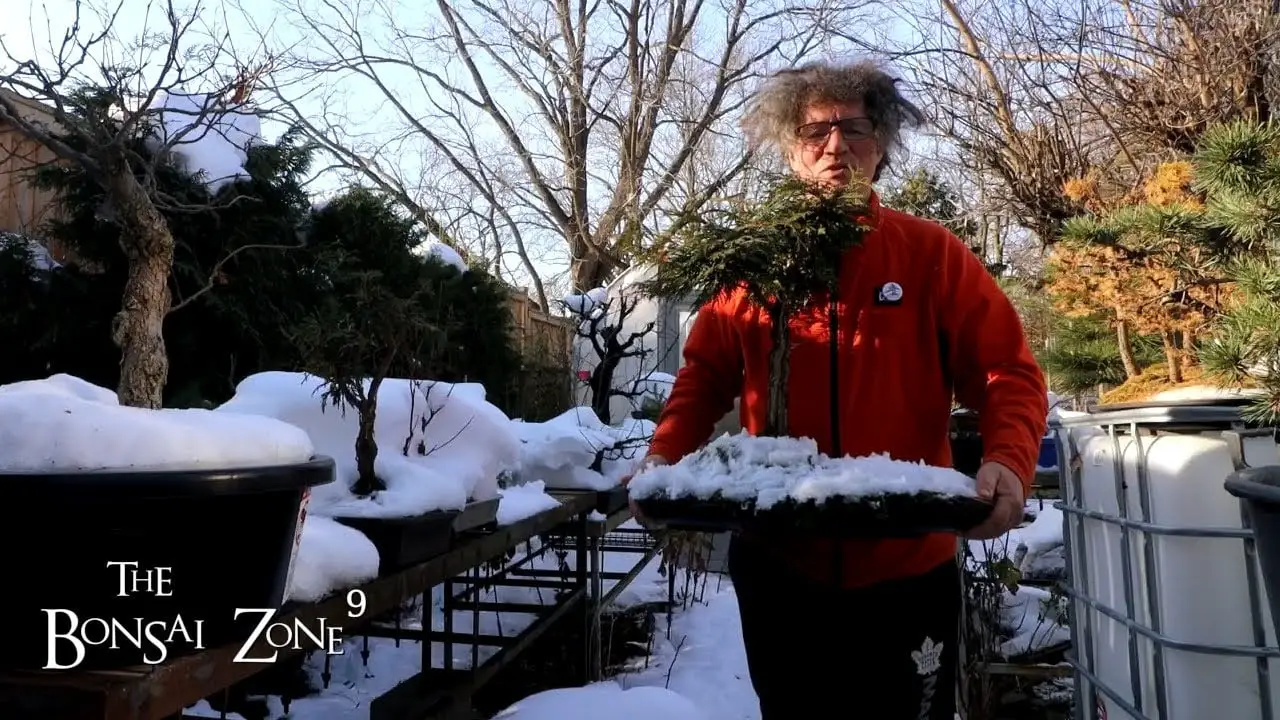
I'm going to work on a fuja tree. I'Ve already pruned up my little Cedar Spirit tree and it's looking nice.
I like the uh. I like what's happening with the branches on it. It'S looking good and I also exposed some of the roots, because this is a root of a rock planting and I kind of have a sister tree to this.
I have the witch's tree over here, which is this Cedar Eastern White Cedar or thuja occidentalis, and it is also a root over Rock and there's a lot of good stuff happening on this tree. So I think it's time to prune it up.
I never did get a chance. It'S been growing wild all summer. I think it's time to get it pruned up just remove some of this snow off of it. Okay, I think that's good I'll bring it inside into the greenhouse.
Thank you tonight we have the kitchen or Waterloo Bonsai society's meeting, it's an in-person meeting and it is a swap meet, so that should be lots of fun, I'm not sure exactly where the front will be on this tree.
On this side, I have a lot of dead wood and I'm hoping the tree kind of closes around that Deadwood, eventually heals itself to get that nice scar running up the length of the tree on the other side, it's very rough, the bark is all flaking off, Looks rather old and ancient, I checked an older video and this was the intended front right from the beginning.
So there is some scarring on it. I ripped a branch off here and you can see. There'S a scar, that's healed, looks really nice there's one here. You can see where I tore down the trunk all the way down to about here, and you can see it's got this beautiful scar, that's healed over there.
I just love that it just it creates these like flow lines around the trunk that are just beautiful. You can see up top here how much this scar this Deadwood part, has healed. You know it's grown in a good 10 millimeters there and it's starting to roll around on this side.
So it's getting there it's starting to close this wound in which will be really nice. It'Ll leave a really nice scar here in the future, and the reason I I put this Deadwood here is: I cut some branches off and I wanted to tie all that dead.
Wood together to look like, maybe you got a lightning strike on the side of the tree or something and I left live wood all the way down to the base uh so or I stopped the dead wood before the roots, so it wouldn't rot away too much And I think that'll heal over really nicely.
My witch's tree is a root over Rock tree. It was planted in April of 2020 and I arranged all the roots around the rock the best I could and then I placed rocks around it to hold those roots in place. Last year I removed all those rocks and I replaced it all with a nice fine layer of moss around the rock.
So all the new Roots would grow into that Moss. That kind of clings tightly to the Rock. So I wouldn't get any Roots growing out in space that weren't like tightly gripping The Rock. So it should look really good someday when I expose all the roots – and maybe today I can expose some of the surface Roots here and we can get kind of a good idea of how it's developing so right.
Now all the surface is frozen, so I'm going to wait till that thaws before I do any work around the root base. Here, I'm going to begin by pruning up the tree in most of my videos. I'M talking about flow lines.
You know these branches gracefully flowing off the trunk and subdividing, so everything flows beautifully and it creates a really nice looking tree. The switch's tree is the opposite. I want it to look contorted, so I don't want graceful flowing branches.
I want right angles and sharp angles and strange strange patterns in the branches. I want it to look unified. I don't want. You know one section of the tree smooth looking and the other very angular. I want it all cohesive.
So I want to get that kind of uh, which is tree style, a contorted look, so it won't follow the normal rules of flowing branches instead I'll try for creating unusual bends pruning it. So I get you know sharp angles and twisted trees and hanging branches and strange movement to it.
So that's my goal. All right, I'm taking a look at it, so I I always say you know the first step when you go to print a tree is study. The tree study, the branches see come up with a plan of action is basically what I want to do.
Here'S a good example of a branch it swoops upwards. All the branches come off at a nice angle, there's a hanging Branch here. If I were to prune off all this upper section, I could have this Branch rising up and then diving down giving an angular Bend to that branch.
It would look really good, very contorted, like a witch's tree, there's some good uh twisting action in the the trunk lines here. The vascular tissue or connecting uh flow lines, it's sort of twisting around scars and that it's looking really good.
So another look with these witches trees and uh little Cedar Spirit trees. Is you don't want it looking Lush, you want it looking like it's tortured, and so this foliage should be very sparse in the end.
So you want to shorten everything as much as you can. Reducing it back and getting rid of that Lush settled look to the tree. It'S got to look like it's just kind of barely surviving like it's magical, so here's another Branch here it kind of swoops upwards.
I got a little Branch coming off here. I'Ve got one kind of diving down here, one going up and then the continuation of the Branch goes quite long and horizontal. So I'm going to take off that part of the branch keeping my one growing down I'll, take off the one going up and bring this one back and turn this one back again, making the foliage sparse and that's got that Branch pruned up.
So it has a nice angular movement to it. This other Branch here I'll show you a close-up of it. It'S being pruned before to get angular movement, and it's looking pretty good. So this Branch right here it was sweeping upwards.
I pruned off the upward part, and now I have a horizontal Branch coming out, so I'm trying to see if there's anything I can any way I can make it more angular um. I think so. I think this whole sidekick them off here.
So I'm going to remove this section of the branch which is pretty major. It leaves me now. The branch comes up kind of goes horizontal. Here I have a shoot underneath, which is nice, so I could prune everything away and keep that shoot.
That'S kind of bending down. I think I will I'm going to keep this one as a safety. Just in case this were to die off or anything I'd have another Branch as a backup. So once this strengthens up, I can prune this one off.
There'S another Branch here kind of coming out the front um, it's kind of like almost the leader of the tree. The leader is back here, but it is a a front branch that kind of it's not quite an eye poker Branch, but it it comes out.
Quite far forward um, if I can direct it to the left, it would be better we'll take the top off here and take this part off again, making the tree more sparse and kind of pruning for angular movement.
There'S a lot of branches in this area way too many I'm going to take out this vertical one pick up this one like this one spot, there's one two, three, four: five: six, seven branches going from one spot on this tree and you know if you leave That you'll get this big.
The branch will come up and you'll get this knuckle on this big ball, where all the branches come out and it doesn't look good yeah. So I I'll show you that area actually come over here right here. There'S yeah all those branches coming from one end of this Branch here and you'll, get a big ball shape here, where all the branches come off.
If you don't prune it away, so it's one dividing into two that went off. That'S one come on this one, so I've got it down to two branches. Now it's looking much much better. It'S always hard to know how far to prune some of these branches back.
You know they're more vigorous in the Apex less vigorous down low. Sometimes you know I do prune a branch back too far and it dies off rather than regrowing, but not very often most of the time I'm well.
I guess I'm getting better at pruning with more predictable results, which is you know something you develop over the years through trial and error, and you know I've had a lot of error. That'S how you learn.
I'Ve got in this area here I have. This Branch comes up divides into a y and then behind that y I have another Branch going up, so I've got like three branches kind of coming up in that area. It looks kind of strange and I think I've got to pick pick and choose and get rid of some branches.
So here's that area here, here's my Branch going to the left to the right and behind that I have a vertical one. So I've got to decide what I want to do. I got rid of the one to the left, hmm sure might look too ordinary looking the tree, then it's got a good kind of zigzag.
Coming up goes back to the right um. I got rid of this one, then there's nothing really up front here, so I I think I should get rid of the vertical one and behind right here. So I'll get rid of that like that yeah it looks a little better if you have a tortured tree.
Usually, the branches don't go vertical, they kind of hang droop, looks spooky vertical branches, meaning vigorous growth, usually so kind of want to avoid those. This back branch is awfully long. It has that cool twist.
I wonder if I'd be better to remove it, it would make my Apex a lot tighter, it's kind of long and spreading. Oh, it is, and I think, instead of cutting it off, I would rip it off yeah. It'S a tough decision definitely would get my canopy more compact, it's just too spreading this branch.
Let'S see what I can do all right, so here I go, I'm going to kind of try ripping it first. What happens here it comes. You can see it's separating tearing down the trunk line nicely. Ah that came off really nice, so you can see there.
It'S ripped off from the front now yeah the tree is way more compact. I I like that actually and I'm wondering if I need to do the same for this branch, which is also very spreading cool Branch, but I was thinking maybe just the top half of it, keeping this.
Let'S try that first here I go. I'M gonna do another rip here, so here I go. I'M going to try grabbing that branch pulling back. I don't know what it'll do here. It goes. Okay, it ticking more than I wanted, but let's see what happens it kind of stops there.
Now, if I left that this Branch would probably grow, but I I don't know if I want that, maybe this will be a technique to use in the future splitting branches and hanging them. But I think I've got to proceed with this, ripping it down the trunk line.
So here I go there you go that came off really nice. You can see that scar just beautiful perfect, so that again has made the tree more compact yeah. I I like that that looks really really good. So look at the tree now you can see it's pretty heavy up here now.
I think that's just a matter of pruning voila a lot of interesting work on the tree today, so I'm removing all these vertical shoots that are sticking up, there's a lot of them on top here. I certainly don't want this Apex higher than this one.
So this kind of ripping of the branches it happens in nature when you get those big snow loads on the trees, it'll actually strip branches off them. So it's nothing new for the species of tree to have branches ripped off this time in winter, which is still fall.
I guess technically speaking, I may have to reduce it and hide it just a little more I'm gonna try taking it back to here. You know just a little bit off the top, I'm not sure I like the branches on this side of the Apex.
I might want to bring it over here more and get less over here, because it's kind of blocking your view of the trunk behind it. A little bit it's not bad, but um I could get rid of that upward cross. Well, I I think it looking it's looking quite nice I'll show you a shot of it now we'll fly in and have a look at it: [, Music, ]! Thank you! [, Music, ], [, Music, ].
Thank you, [ Music, ], [, Music ]. I think the witch's tree made some good improvements today. I could see more work coming in the future, maybe more Branch splitting and bending and anything to make it look gnarled and contorted.
I think yeah that'll come with time I'll, keep doing these techniques on it and over time it's going to turn into this really yeah really tortured tree uh, but it'll always get the best of care. Of course.
So now I'm going to go down and look at the root base so on the roots. Here, I'm just going to pick off the Moss, that's starting to climb up the trunk here and get rid of that be careful not to drop it in my water barrel, which I just did so I'm just removing some of this Moss from kind of around the Base of the tree, these roots should be all set in stone.
By now you know they're kind of arranged Around The Rock and I'll just kind of slowly expose The Roots over time. So this root of Iraq is, you know, it'll be going into its third season. In Spring so and the roots are pretty good on it, it's they're arranged nicely around the rock they're gripping The Rock, so you know root over Rock compositions.
Don'T have to take like 10 years. You can get some pretty good Rock hugging roots in just a few years. I think I'll get the toothbrush and brush that away. Let'S see how loose this bark is, so the bark kind of naturally exfoliates on the full-size cedar trees strips off.
So you can see. I could peel that one off really easily I'll leave it on, but uh. It'S definitely a good spot for bugs to overwinter underneath this bark. But I don't know it looks good with this with the smooth bark.
It also looks good with a rough bark, so I would sand a really mature Cedar. The smooth bark is going to win because it looks more mature, but rough bark is kind of cool. Looking too, that's about all the work I can do on my Cedar today.
The soil is still frozen, so I can't expose any more Roots at all, but there's kind of a look at the root base and that will flow across the rocks and around it. So it should look pretty good uh as it all thickens up yeah.
It'Ll. Look! Quite nice in the future, I think I think the whole tree will look really cool someday. Looking good, I think the witch's tree is coming along. I think it's got a good future ahead of it.
I'Ve got the kitchen or Waterloo Bonsai society meeting tonight, so it should be interesting, a swap meet which will be really fun. I'M going to bring all my cuttings to give away and a lot of my Ficus micro carpet cuttings to give away.
So I've got to get those into individual pots before I go to the meeting, so I better say good night.