
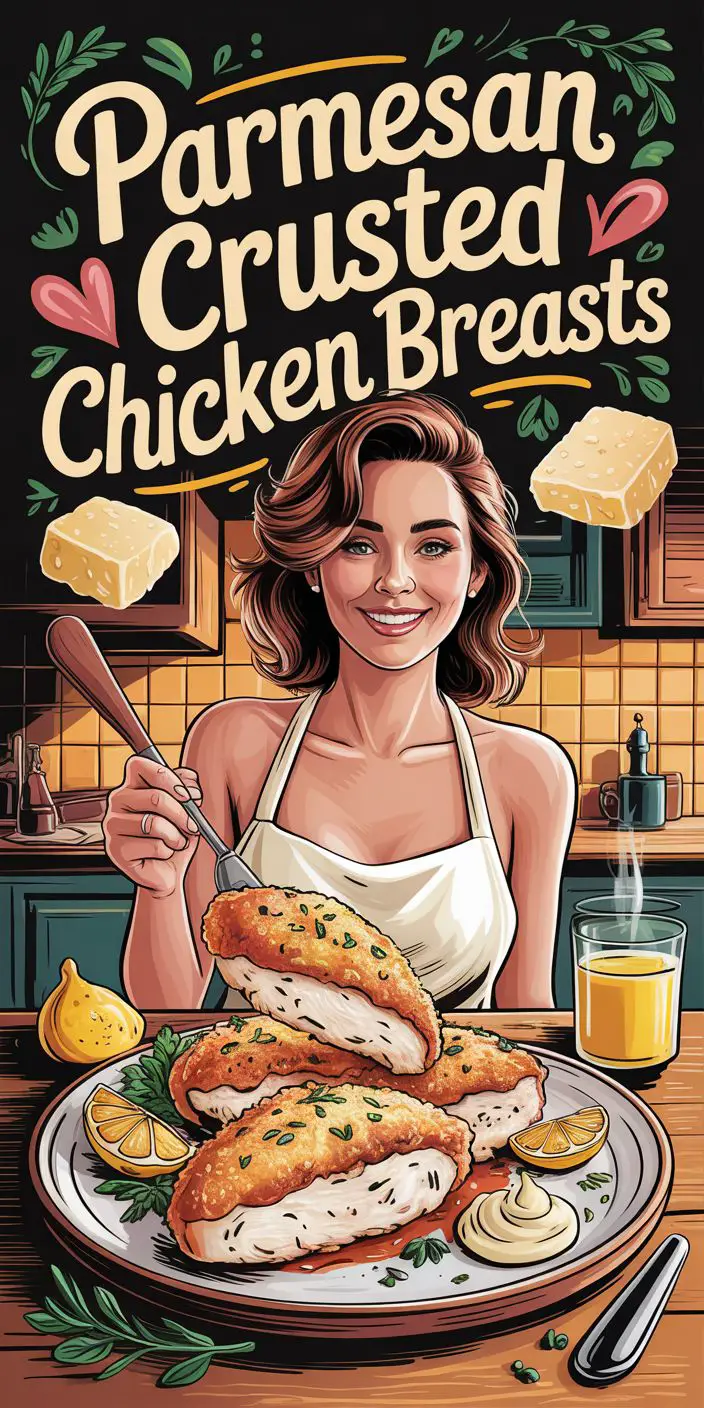
Craving that classic Italian-American comfort food, parmesan crusted chicken breasts, but always falling short of that perfect, restaurant-quality experience?
What if we told you that achieving crispy chicken, a rich, flavorful sauce, and gloriously melted cheese in your own kitchen is not just possible, but surprisingly straightforward?
Forget those soggy, underwhelming attempts of the past. This isn't just another recipe; it's your definitive guide to mastering chicken parmesan. We're about to dive deep into the essential techniques, insider tips, and even some exciting variations that will transform your home-cooked meals.
Prepare to impress your family and friends with a dish so delicious, they'll think you ordered takeout from their favorite Italian spot. From selecting the ideal chicken and crafting the perfect breading to mastering the frying technique and choosing the right sauce and cheese, we'll cover every crucial step.
Plus, we'll even explore some mouthwatering variations to keep things exciting. So, are you ready to ditch the takeout menus and become a chicken parmesan pro? Let's get started on this culinary journey together!
Choosing and Preparing Your Chicken for Optimal Results
The foundation of any great chicken parmesan starts with the chicken itself. According to John Kanell from Preppy Kitchen, who expertly demonstrates this recipe in the video, using boneless, skinless chicken breasts is key.
However, the preparation is just as crucial as the cut. Many home cooks simply grab a chicken breast and start breading, but this often leads to uneven cooking and a less-than-ideal texture. The secret, as John highlights, is to slice each breast horizontally down the middle to create thinner cutlets.
This not only helps the chicken cook more quickly and evenly but also increases the surface area, meaning more of that delicious breading, sauce, and cheese in every bite. As John mentions, “We want them to cook quickly and really have a ton of flavor, so, more breading, more mozzarella, more marinara, more surface area.” This increased surface area is a game-changer for flavor absorption and overall enjoyment.
Once you have your thinner cutlets, the next essential step is pounding them to an even thickness. This ensures that all parts of the chicken cook at the same rate, preventing some areas from becoming dry while others are still undercooked.
Place each cutlet between two pieces of plastic wrap to avoid a messy kitchen and gently pound them with a meat mallet until they are about ½ inch thick. This not only promotes even cooking but also tenderizes the chicken, resulting in a more pleasant eating experience.
Remember, the goal is not to flatten them paper-thin, but to create a uniform thickness throughout. Taking this extra step will significantly improve the final texture and tenderness of your chicken parmesan. Don't skip this crucial stage; it's a hallmark of restaurant-quality results. Properly prepared chicken is the canvas upon which the rest of your masterpiece will be painted.
Crafting the Perfect Breading: The Key to Crispy Perfection
The breading is arguably the most critical component in achieving that signature crispy texture in chicken parmesan. Forget about flimsy, easily detached breading; we're aiming for a golden, crunchy coating that stays put. I would emphasize the importance of a well-structured dredging station, which typically involves three bowls: one for flour, one for eggs, and one for breadcrumbs.
This systematic approach ensures each piece of chicken is properly coated for maximum adhesion and texture. For the flour mixture, use just a third of a cup, seasoned simply with salt and pepper. This light coating helps the egg wash adhere better to the chicken.
Next comes the egg wash, which acts as the “glue” that holds the breadcrumbs in place. John uses two eggs, lightly whisked with a pinch of salt and pepper. This seasoned egg mixture not only binds the breadcrumbs but also adds a touch of richness to the coating.
The real magic, however, happens in the breadcrumb bowl. The secret for an exceptional crunch is using a combination of panko breadcrumbs and regular seasoned Italian breadcrumbs. Panko breadcrumbs are larger and flakier, providing that signature crispy texture, while the seasoned breadcrumbs add flavor and help create a more cohesive coating.
“It gives you a nice kind of combination of really crunchy bits as well as the pieces that'll stick to the chicken and kind of coat the base.” To further enhance the flavor profile, adding half a cup of grated Parmesan cheese and two tablespoons of freshly chopped parsley directly into the breadcrumb mixture.
The Parmesan adds a salty, savory depth, while the parsley provides a fresh, herbaceous note that complements the richness of the dish. Ensure you press the breadcrumbs firmly onto the chicken cutlets so they adhere well during frying and baking. This step is crucial for preventing the breading from falling off and ensuring a beautifully coated and crispy chicken parmesan.
The Art of Frying for Flavor and Texture: Achieving that Golden Crust
While some recipes might skip the frying step, John Kanell’s method of briefly frying the breaded chicken in olive oil is essential for developing a beautiful golden-brown crust and adding an extra layer of flavor.
This step isn't about fully cooking the chicken; it's about creating that desirable texture and visual appeal before the final baking stage. John recommends using about a cup of olive oil in a large pan over medium-high heat. The oil should be shimmering before you add the chicken, indicating that it's hot enough to start the browning process immediately.
“Once that oil starts shimmering, you know you're ready to fry these up.” It's crucial not to overcrowd the pan, so fry the chicken in batches, typically two or three pieces at a time, depending on the size of your pan. Overcrowding can lower the oil temperature, resulting in soggy, rather than crispy, chicken.
The frying time is relatively short, around three to four minutes per side. Keep a close eye on the chicken, as the oil temperature can fluctuate.
“When you first put the chicken in there, the oil is really hot. As soon as you add the chicken in, it immediately brings the temperature down. So that first side, it'll actually cook quicker than the second side.” This is a valuable insight to keep in mind as you're frying.
You're looking for a deep golden-brown color on both sides. Once the chicken is nicely browned, carefully remove it from the pan and place it back onto the baking sheet you used for the breaded chicken. This sets the stage for the final baking process, where the chicken will cook through completely, and the cheese will melt into a gooey, irresistible topping.
The brief frying step is a non-negotiable for achieving that authentic chicken parmesan experience – the combination of the crispy breading and the subsequent baking creates a symphony of textures that is truly satisfying.
Selecting the Right Sauce: Homemade or High-Quality Store-Bought
The sauce is the soul of chicken parmesan, infusing the dish with its rich, tangy, and savory flavors. While making your own homemade marinara sauce can be incredibly rewarding and allows for complete control over the ingredients and taste, using a high-quality store-bought option is perfectly acceptable for a convenient and delicious meal.
In the video, he mentions using Rao's marinara sauce, stating, “You can definitely make your own marinara if you want, I sometimes do. But, today I'm just using a store-bought one I like, it's Rao's, not sponsored.” This endorsement highlights that choosing a good quality store-bought sauce can save time without compromising too much on flavor.
When selecting a store-bought sauce, look for options that are made with simple, high-quality ingredients, such as ripe tomatoes, olive oil, garlic, and herbs. Avoid sauces that are loaded with excessive sugar or artificial additives.
If you have the time and inclination, making your own marinara sauce is a fantastic way to elevate your chicken parmesan. A basic homemade marinara typically involves simmering crushed tomatoes with garlic, onions, olive oil, and Italian herbs like basil and oregano.
The beauty of homemade sauce is that you can customize it to your liking, adjusting the seasonings and simmer time to achieve your desired flavor profile. Whether you opt for store-bought or homemade, the key is to use a sauce that you enjoy the taste of on its own, as its flavor will be a prominent part of the final dish.
Once your fried chicken is on the baking sheet, generously spoon about a third to half a cup of your chosen marinara sauce over each cutlet, ensuring good coverage. This layer of sauce will meld with the cheese during baking, creating that classic chicken parmesan experience we all know and love.
The quality of your sauce truly makes a significant difference in the overall taste of your dish, so choose wisely based on your time constraints and flavor preferences.
The Cheese Factor: Mozzarella and Parmesan for the Perfect Melt
No chicken parmesan is complete without a generous blanket of melted, gooey cheese.
The combination of mozzarella and Parmesan cheese is traditional and provides the perfect balance of meltiness and flavor.The importance of a good amount of cheese, stating, “…and then some cheese, and then some more cheese.
This is literally making me smile right now, not metaphorically, literally, just 'cause I can smell it and almost taste it.” For the primary melting component, shredded mozzarella cheese is the go-to choice. Its high moisture content allows it to melt beautifully and create that classic, stretchy, cheesy pull that is so characteristic of chicken parmesan.
Use a generous sprinkle of shredded mozzarella over the marinara sauce on each chicken cutlet. He also mentions that you could definitely use fresh mozzarella that you slice, which would offer a slightly different texture and a richer, more milky flavor. The choice between shredded and fresh mozzarella often comes down to personal preference and what you have on hand.
In addition to the mozzarella, a sprinkle of grated Parmesan cheese is essential for adding a salty, sharp, and nutty flavor that complements the richness of the dish. John uses a microplane to finely grate fresh Parmesan over the mozzarella. He notes that a regular cheese grater works just as well.
The finely grated Parmesan not only adds flavor but also contributes to that beautiful golden-brown crust on top of the cheese as it bakes. As a bonus, John shares his love for the crispy, slightly burnt cheese that oozes onto the baking sheet, calling it the first thing he eats out of the oven.
This little tidbit highlights the deliciousness that comes from the interaction of the cheese with the heat of the oven. Once the chicken is topped with both mozzarella and Parmesan, it's ready to go into the preheated oven. The baking process allows the cheese to melt into a glorious, bubbly blanket, melding with the sauce and the crispy chicken to create the ultimate chicken parmesan experience.
Don't skimp on the cheese; it's a fundamental element of this beloved dish.
Baking to Golden Perfection: The Final Transformation
With the chicken breaded, fried to a golden crisp, and topped with a generous layer of marinara sauce, mozzarella, and Parmesan cheese, the final step in creating perfect chicken parmesan is baking it to golden perfection in the oven. John Kanell specifies an oven temperature of 425 degrees Fahrenheit.
This relatively high temperature ensures that the cheese melts quickly and becomes beautifully golden and bubbly without overcooking the chicken. The baking time is typically 15 to 20 minutes, or until the cheese has reached that ideal state of melted, golden, and bubbly goodness.
It's important to keep an eye on the chicken during this final stage to prevent the cheese from burning. You want it to be nicely browned and bubbly, not charred. The baking process allows all the flavors to meld together, creating a harmonious and satisfying dish.
The heat from the oven finishes cooking the chicken through while simultaneously melting the cheese into an irresistible, gooey topping that perfectly complements the crispy breading and the flavorful sauce.
As the chicken bakes, the aroma filling your kitchen will be absolutely mouthwatering, a testament to the deliciousness that is about to emerge from the oven. Once the cheese is golden and bubbly, carefully remove the baking sheet from the oven.
Allow the chicken parmesan to rest for a few minutes before serving. This resting period allows the cheese to set slightly, making it easier to serve and preventing it from sliding off the chicken. John’s enthusiasm is evident when he says, “It's too hot, but it's so delicious.” This sentiment perfectly captures the anticipation and satisfaction that comes with enjoying a perfectly baked chicken parmesan. The combination of the crispy chicken, the rich sauce, and the melted cheese creates a truly comforting and satisfying meal that is perfect for a weeknight dinner or a special occasion. Follow these baking instructions carefully to achieve that restaurant-quality finish that will have everyone asking for seconds.
Beyond the Classic: Exciting Chicken Parmesan Variations
While the classic chicken parmesan is undeniably delicious, there are numerous exciting variations you can explore to add your own personal touch or cater to different dietary preferences. One popular variation is using eggplant instead of chicken to create a vegetarian-friendly Eggplant Parmesan. The process is quite similar, with slices of eggplant being breaded and fried before being layered with marinara sauce and cheese. For those who enjoy a bit of heat, consider adding a pinch of red pepper flakes to your breadcrumb mixture or using a spicy marinara sauce to create a Spicy Chicken Parmesan. This adds a delightful kick that elevates the dish. You can also incorporate vegetables into your chicken parmesan. Thinly sliced zucchini, bell peppers, or mushrooms can be sautéed and layered with the chicken, sauce, and cheese for added flavor and nutrients. Another interesting variation is using different types of cheese. While mozzarella and Parmesan are traditional, you could experiment with provolone for a slightly sharper flavor or a blend of Italian cheeses for a more complex taste profile.
For a lighter take on the classic, you could try baking the breaded chicken instead of frying it. While it might not achieve the exact same level of crispiness, it's a healthier alternative that still delivers delicious flavor. If you're looking for a different kind of breading, consider using crushed crackers or almond flour for a gluten-free option. These variations demonstrate the versatility of chicken parmesan and offer opportunities to get creative in the kitchen. Whether you stick to the traditional recipe or venture out and try some of these exciting alternatives, the core elements of crispy breading, flavorful sauce, and melted cheese remain the heart of this beloved dish. Don't be afraid to experiment and find your own favorite way to enjoy chicken parmesan. The possibilities are truly endless, allowing you to tailor this classic to your specific tastes and preferences.
Tips for Success and Troubleshooting Common Issues
Even with a detailed guide, there are always a few extra tips and tricks that can help ensure your chicken parmesan turns out perfectly every time. One common issue is preventing the breading from becoming soggy. To avoid this, make sure your fried chicken is properly drained on a wire rack before adding the sauce and cheese. This allows any excess oil to drip off, keeping the breading crispier for longer. Another tip is to avoid overcrowding the baking sheet. If you're making a large batch, it's better to bake the chicken in batches to ensure even cooking and browning. If you find that your cheese is browning too quickly in the oven, you can loosely tent the baking sheet with aluminum foil to slow down the browning process while still allowing the cheese to melt completely. Using a good quality non-stick baking sheet can also prevent the chicken from sticking and make cleanup easier. If you're making chicken parmesan ahead of time, you can bread and fry the chicken, then store it in the refrigerator. When you're ready to bake, simply top it with sauce and cheese and proceed with the baking instructions. However, keep in mind that the breading might not be as crispy as if it were freshly fried.
Another helpful tip is to preheat your oven thoroughly before placing the chicken inside. This ensures that the chicken starts cooking immediately and evenly. Don't be afraid to adjust the baking time slightly based on your oven and the thickness of your chicken. The key is to look for the cheese to be melted, golden, and bubbly, and the chicken to be cooked through. If you're using store-bought marinara sauce, consider adding a few extra ingredients like fresh garlic, onions, or herbs to enhance its flavor. A drizzle of good quality olive oil over the finished dish can also add a touch of richness and flavor. By keeping these tips in mind and troubleshooting common issues proactively, you'll be well on your way to consistently making delicious and restaurant-quality chicken parmesan that everyone will love. Remember, practice makes perfect, so don't be discouraged if your first attempt isn't flawless. Keep experimenting and refining your technique, and you'll soon become a chicken parmesan expert!
Wrapping Up: Your Journey to Perfect Chicken Parmesan
Congratulations! You've now journeyed through the essential steps and expert tips for creating truly perfect chicken parmesan in your own kitchen. From the crucial preparation of the chicken breasts to the art of crafting a crispy breading, the flavor-enhancing frying technique, the selection of the perfect sauce and cheese, and the final baking to golden perfection, you're now equipped with the knowledge to elevate your cooking game. We've also explored exciting variations to inspire your culinary creativity and provided valuable troubleshooting tips to ensure your success. Remember, the key to a truly outstanding chicken parmesan lies in the details – taking the time to properly prepare each component and paying attention to the nuances of each step. Whether you're cooking for a cozy family dinner or planning a special gathering, this ultimate guide will serve as your trusted companion in the kitchen.
Don't forget the magic of fresh ingredients and the impact they have on the final flavor. Consider using high-quality store-bought marinara like Rao's or even trying your hand at making your own from scratch. The choice of cheese, whether it's classic shredded mozzarella or creamy fresh slices, also plays a significant role in the overall experience. And most importantly, enjoy the process! Cooking should be a joyful and rewarding experience. So, gather your ingredients, follow these steps, and get ready to savor the taste of homemade chicken parmesan that rivals your favorite restaurant. The aroma alone will be enough to make your mouth water, and the first bite will confirm that you've truly unlocked the secret to this beloved dish. Now, it's time to put your newfound knowledge into action and create a culinary masterpiece that will impress everyone around your table.
Key Takeaways: Mastering Chicken Parmesan
- Prepare Chicken Properly: Slice chicken breasts thinly and pound them to an even thickness for quick and even cooking.
- Craft Crispy Breading: Use a three-bowl dredging station with seasoned flour, eggs, and a mixture of panko and regular breadcrumbs with Parmesan and parsley.
- Fry for Flavor and Texture: Briefly fry the breaded chicken in olive oil until golden brown to develop a crispy crust and enhance flavor.
- Choose Quality Sauce: Opt for a high-quality store-bought marinara or make your own from scratch for the best flavor base.
- Don't Skimp on Cheese: Use a generous amount of shredded mozzarella for meltiness and grated Parmesan for flavor.
- Bake to Perfection: Bake at 425°F until the cheese is melted, golden, and bubbly, and the chicken is cooked through.
- Explore Variations: Get creative with eggplant, spices, vegetables, or different types of cheese.
- Prevent Soggy Breading: Drain fried chicken on a wire rack before adding sauce and cheese.
Actionable Step-by-Step Checklist: Making Perfect Chicken Parmesan
Category 1: Preparation
Task 1: Prepare the Parsley
- Step 1: Wash a few sprigs of fresh parsley.
- Step 2: Remove the leaves from the stems.
- Step 3: Chop the parsley finely.
Task 2: Prepare the Chicken
- Step 1: Get four chicken breasts.
- Step 2: Slice each breast in half horizontally.
- Step 3: Place each piece between plastic wrap.
- Step 4: Gently pound the chicken until it's about ½ inch thick.
Category 2: Setting Up the Dredging Station
Task 1: Prepare the Flour
- Step 1: Put ⅓ cup of flour in a bowl.
- Step 2: Add a pinch of salt and pepper to the flour.
- Step 3: Mix it together.
Task 2: Prepare the Eggs
- Step 1: Crack two eggs into another bowl.
- Step 2: Add a pinch of salt and pepper to the eggs.
- Step 3: Whisk the eggs with a fork.
Task 3: Prepare the Breadcrumbs
- Step 1: Put 1 cup of panko breadcrumbs in a third bowl.
- Step 2: Add ½ cup of seasoned Italian breadcrumbs.
- Step 3: Add ½ cup of grated Parmesan cheese.
- Step 4: Add the chopped parsley.
- Step 5: Mix everything together.
Category 3: Coating and Frying the Chicken
Task 1: Coat with Flour
- Step 1: Dip each piece of chicken in the flour.
- Step 2: Make sure all sides are covered.
- Step 3: Shake off any extra flour.
Task 2: Dip in Egg
- Step 1: Dip the floured chicken into the whisked eggs.
- Step 2: Let any extra egg drip off.
Task 3: Coat with Breadcrumbs
- Step 1: Put the egg-covered chicken in the breadcrumb bowl.
- Step 2: Sprinkle breadcrumbs on top and press them down.
- Step 3: Make sure all sides are covered.
Task 4: Fry the Chicken
- Step 1: Pour about 1 cup of olive oil into a big pan.
- Step 2: Ask a grown-up to turn the stove to medium-high heat.
- Step 3: Wait until the oil looks like it's shimmering.
- Step 4: Carefully put two or three pieces of chicken in the pan.
- Step 5: Cook for 3 to 4 minutes on each side until golden brown.
- Step 6: Take the chicken out and put it on a baking sheet.
Category 4: Baking the Chicken Parmesan
Task 1: Add Sauce and Cheese
- Step 1: Spread some marinara sauce on top of each piece of fried chicken.
- Step 2: Sprinkle lots of shredded mozzarella cheese on top of the sauce.
- Step 3: Sprinkle a little bit of grated Parmesan cheese on top of the mozzarella.
Task 2: Bake
- Step 1: Ask a grown-up to preheat the oven to 425 degrees.
- Step 2: Put the baking sheet in the oven.
- Step 3: Bake for 15 to 20 minutes, or until the cheese is melted and bubbly.
Category 5: Enjoy!
- Step 1: Ask a grown-up to take the hot chicken out of the oven.
- Step 2: Let it cool for a few minutes.
- Step 3: Eat and enjoy your yummy chicken parmesan!